So excited as I am writing this post for today I am currently flying to Salt Lake City for On Stage 2017! So excited to meet up w my friends and meet new ones!
Annual awards for this past year are awarded! Earning Alaska was my biggest achievement! I earned all the awards this year again! If you follow my blog at all you know how such a rough year it has been for myself and family. Feeling very grateful for my supportive customers that love these products as much as I do.
Over the next few days I will be sharing pics from the event. Also will be posting to my business page which can be found here. I invite you to like that page as I try to post lots of inspiration thru projects.
Have a creative day!
Stampin Darla
Day 22 is Inspirational Sunday sharing one of my favorite songs by Big Daddy Weave.
Today I am grateful for a very fun event last night meeting a new friend. Also a friend stamping for her first time. I will be posting about that event this week.
Been missing a few days here and there of this month long challenge of posting daily. Some days are spent prepping and getting ready for upcoming events and continuously working on finding balance with all that I do.
Hard to believe that this month is ending this week. This month zoomed by and November is right around the corner. I am so excited my beautiful mom gets to come in about two weeks to visit!
These will be available to purchase on November 1, 2017!
Sneak peek with this video!
I will share more details tomorrow on these alcohol based markers!
Day 20 of my blog challenge I am grateful for all my readers that have taken time to keep up with me thru this challenge. It really means a lot to me! If this is your first time of visiting I invite you to start back on October 1st and read my journey I have shared all month long.
I have something planned fun for the end of this month too!
Day 19 of my blog challenge wanted to share this quick video with some tips and tricks using these embossing folders.
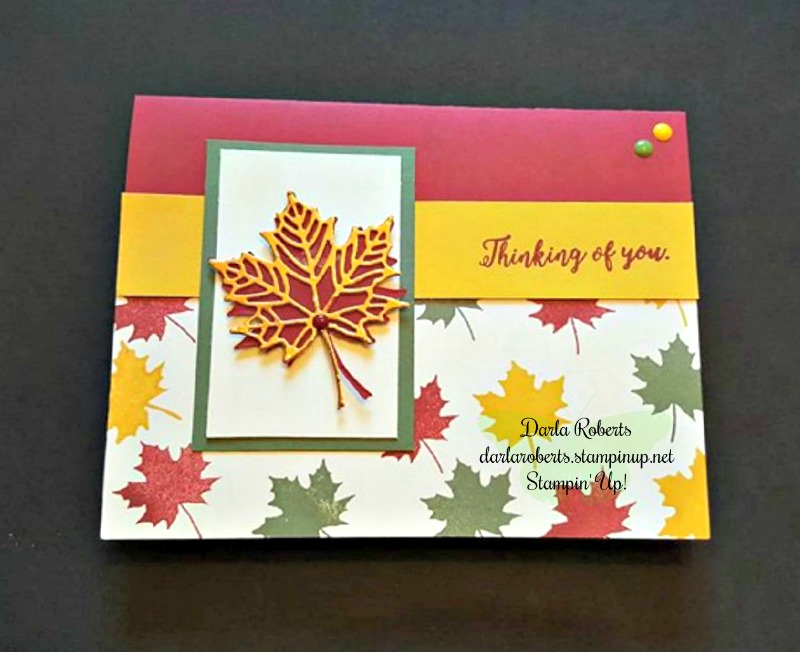
Had a fun creative card class tonight! My next one will be November 28th.
So grateful for my fun ladies that came tonight. We had so many laughs! We had a blast stampin too of course!
I will share my cards from class in the next few days.
Been a long day. I got to watch a special little guy today.
The content in this blog is the sole responsibility of Darla Roberts as an Independent Stampin’ Up! Demonstrator. Stampin’ Up! does not endorse the use of or contents of the classes, services, or non-Stampin’ Up! products I may offer here.